
10 DIY Gifts: Fathers Day Handprint Crafts
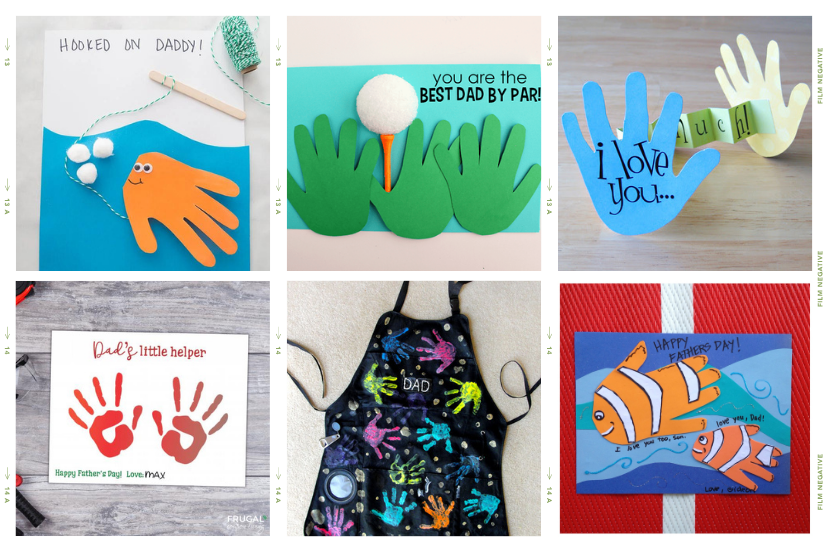
Father’s Day is a special occasion to honor and appreciate the dads in our lives. Fathers Day handprint crafts are a wonderful way to create personalized gifts that capture precious memories. In this article, we will explore ten unique handprint craft ideas for Father’s Day. Follow the step-by-step instructions for each craft to create heartfelt keepsakes that will bring a smile to your dad’s face.
Importance of Father’s Day Handprint Crafts
Handprint crafts hold sentimental value as they symbolize a child’s growth and the loving bond between parent and child. Father’s Day handprint crafts provide an opportunity to express love and gratitude while engaging in a creative and enjoyable activity. These crafts become cherished keepsakes that hold special meaning for both dad and child.
Handprint Craft Ideas for Father’s Day
1. Handprint Card
Materials:
- Cardstock or construction paper
- Washable paint
- Paintbrush
- Marker or pen
Instructions:
- Fold the cardstock or construction paper in half to create a card.
- Choose a color of paint and brush it onto your child’s hand, covering the palm and fingers.
- Carefully guide your child to press their hand onto the front of the card, creating a handprint.
- Allow the paint to dry completely.
- Open the card and write a heartfelt message or poem inside, expressing your love for your dad.
2. Handprint Canvas
Materials:
- Blank canvas
- Acrylic paints
- Paintbrushes
- Marker or pen
Instructions:
- Place the blank canvas on a protected surface.
- Pour a small amount of acrylic paint onto a palette or paper plate.
- Help your child select a color and evenly coat their hand with the paint using a brush.
- Carefully guide your child to press their hand onto the canvas, creating a handprint.
- Repeat the process with different colors to create a vibrant and unique design.
- Allow the paint to dry completely.
- Use a marker or pen to write a special message or your dad’s name on the canvas.
3. Handprint Keychain
Materials:
- Air-dry clay or polymer clay
- Rolling pin
- Cookie cutter or knife
- Straw or skewer
- Acrylic paints
- Varnish (optional)
- Keyring
Instructions:
- Roll out the clay using a rolling pin until it is about ¼ inch thick.
- Help your child press their hand firmly into the clay to create a handprint.
- Use a cookie cutter or knife to cut around the handprint, creating the desired shape.
- Use a straw or skewer to poke a hole near the top of the clay shape.
- Allow the clay to dry according to the package instructions.
- Once the clay is dry, use acrylic paints to decorate the handprint shape with colors of your choice. Let the paint dry completely.
- Apply a layer of varnish (optional) to protect the paint and give the keychain a glossy finish.
- Attach a keyring through the hole in the clay shape.
- Your handprint keychain is now ready to be gifted to your dad.
4. Handprint Photo Frame
Materials:
- Wooden or cardboard photo frame
- Washable paint
- Paintbrushes
- Marker or pen
- Glue
- Family photo
Instructions:
- Remove the glass from the photo frame and set it aside.
- Paint your child’s hand with washable paint using a brush.
- Help your child press their hand onto the frame, creating a handprint.
- Repeat the process with different colors if desired.
- Allow the paint to dry completely.
- Once dry, write a special message or your dad’s name on the frame using a marker or pen.
- Glue your family photo onto the frame, ensuring it fits within the handprint area.
- Insert the glass back into the frame and secure it.
- Your handprint photo frame is now ready to be displayed with a cherished family photo.
5. Handprint T-Shirt
Materials:
- Plain white T-shirt
- Fabric paints
- Paintbrushes
- Cardboard or plastic sheet
Instructions:
- Place a cardboard or plastic sheet inside the T-shirt to prevent paint from bleeding through.
- Pour fabric paints onto a palette or paper plate.
- Dip your child’s hand into the paint, making sure it is evenly coated.
- Carefully guide your child to press their hand onto the front of the T-shirt, creating a handprint.
- Repeat the process with different colors to create a colorful pattern.
- Allow the paint to dry completely.
- Once dry, follow the instructions on the fabric paint packaging to heat-set the design.
- Your handprint T-shirt is now ready for your dad to wear proudly.
6. Handprint Coaster
Materials:
- Ceramic or cork coasters
- Washable paint
- Paintbrushes
- Clear varnish or sealant
Instructions:
- Place the coaster on a protected surface.
- Paint your child’s hand with washable paint using a brush.
- Carefully guide your child to press their hand onto the coaster, creating a handprint.
- Repeat the process to create multiple handprint coasters or add different handprints to a single coaster.
- Allow the paint to dry completely.
- Once dry, apply a coat of clear varnish or sealant to protect the paint and make the coaster waterproof.
- Let the varnish dry completely before using the coaster.
- Create a set of handprint coasters for your dad to enjoy his favorite beverages.
7. Handprint Mug
Materials:
- Plain white ceramic mug
- Porcelain or ceramic paints
- Paintbrushes
- Oven
Instructions:
- Wash and dry the ceramic mug.
- Paint your child’s hand with porcelain or ceramic paints using a brush.
- Carefully guide your child to press their hand onto the mug, creating a handprint.
- Repeat the process with different colors or create multiple handprints on the mug.
- Allow the paint to dry completely.
- Once dry, follow the instructions on the paint packaging for baking or heat-setting the design.
- Place the mug in a cold oven and then heat it according to the instructions to cure the paint.
- Once the mug has cooled down, it is safe to use and hand wash.
8. Handprint Garden Stone
Materials:
- Concrete mix
- Large plastic container or mold
- Water
- Mixing tools (spoon, trowel)
- Washable paint
- Paintbrushes
- Clear varnish (optional)
Instructions:
- Prepare the concrete mix according to the instructions on the packaging, using water and mixing tools.
- Pour the concrete mix into a large plastic container or mold, shaping it into a flat surface.
- Help your child press their hand firmly into the wet concrete, creating a handprint.
- Allow the concrete to dry and set completely according to the instructions on the packaging.
- Once dry, carefully remove the garden stone from the container or mold.
- Paint the handprint with washable paint in vibrant colors.
- If desired, apply a coat of clear varnish to protect the paint and give the garden stone a glossy finish.
- Find a special spot in the garden where the handprint garden stone can be displayed.
9. Handprint Apron
Materials:
- Plain white apron
- Fabric paints
- Paintbrushes
- Cardboard or plastic sheet
Instructions:
- Place a cardboard or plastic sheet inside the apron to prevent paint from bleeding through.
- Pour fabric paints onto a palette or paper plate.
- Dip your child’s hand into the paint, ensuring it is evenly coated.
- Carefully guide your child to press their hand onto the apron, creating a handprint.
- Repeat the process with different colors or add multiple handprints to the apron.
- Allow the paint to dry completely.
- Once dry, follow the instructions on the fabric paint packaging to heat-set the design.
- Your handprint apron is now ready for your dad to wear while cooking or grilling.
10. Handprint Wall Art
Materials:
- Canvas or poster board
- Washable paint
- Paintbrushes
- Marker or pen
- Picture frame (optional)
Instructions:
- Place the canvas or poster board on a protected surface.
- Paint your child’s hand with washable paint using a brush.
- Carefully guide your child to press their hand onto the canvas, creating a handprint.
- Repeat the process with different colors to create a vibrant and unique design.
- Allow the paint to dry completely.
- Once dry, use a marker or pen to write a special message or your dad’s name around the handprint.
- Optionally, you can frame the handprint wall art to give it a polished and finished look.
- Hang the handprint wall art in a prominent place where it can be admired.
Conclusion
Father’s Day handprint crafts are a beautiful way to express love, create lasting memories, and celebrate the special bond between fathers and children. By following the step-by-step instructions for each craft, you can create personalized and heartfelt gifts that your dad will cherish. Get creative, enjoy the process, and make this Father’s Day extra special with these handprint crafts.
FAQs
- Can I wash the handprint crafts?
For most handprint crafts, such as cards, canvases, and frames, it is best to avoid washing them. However, if you’re using washable paint and the craft is intended to be washable, follow the care instructions specific to the materials used.
- Are these handprint crafts safe for children?
Yes, these handprint crafts are safe for children when using child-friendly materials. Ensure the paints, clay, and other supplies are non-toxic and suitable for children. Adult supervision is also recommended throughout the crafting process.
- Can I customize the handprint crafts with additional decorations?
Absolutely! Feel free to get creative and add extra decorations to the handprint crafts. You can use glitter, stickers, ribbons, or any other embellishments that reflect your dad’s interests and personality.
- How long do the handprint crafts take to dry?
The drying time depends on the materials used. Washable paints generally dry within a few hours, while air-dry clay may take 24-48 hours to fully dry. Follow the instructions on the specific materials for accurate drying times.
- Can I make variations of the handprint crafts?
Certainly! The suggested handprint crafts are just starting points. You can modify the designs, colors, and materials to suit your preferences. Get creative and make each craft unique to your dad’s taste.
- How can I make the handprint crafts last longer?
To ensure the longevity of handprint crafts, it’s best to keep them away from direct sunlight, moisture, and extreme temperatures. Additionally, using a clear varnish or sealant can help protect the painted surfaces and prolong their lifespan.
Remember, the most important aspect of these handprint crafts is the love and thought put into them. Whether you choose one craft or try them all, your dad will appreciate the effort and sentiment behind these personalized gifts. Enjoy the process of creating beautiful memories and celebrating the special bond between father and child.


