
Ladybug Painted Rocks: Step-by-Step Guide
I’ve come across many delightful and engaging projects, but one that never fails to bring a smile to children’s faces is the Ladybug Painted Rocks Craft. This simple and creative activity allows kids to explore their artistic side while creating adorable ladybug-themed decorative pieces. In this article, I will guide you through the process step-by-step and provide helpful suggestions along the way.
Understanding Ladybug Painted Rocks Craft
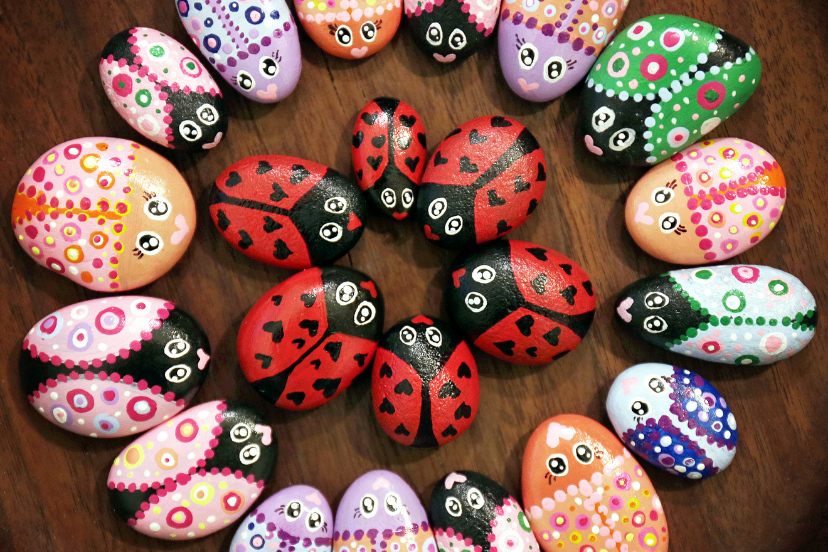
The Ladybug Painted Rocks Craft involves transforming ordinary rocks into charming ladybug replicas using paint and a few other materials. It’s an excellent project for kids as it combines artistic expression, fine motor skills development, and an opportunity to learn about nature.
Materials Required for Ladybug Painted Rocks Craft
Before we dive into the step-by-step instructions, let’s gather the necessary materials:
- Smooth rocks of various sizes
- Acrylic paint (red, black, and white)
- Paintbrushes (small and medium-sized)
- Water container
- Paper towels or a cloth
- Clear acrylic sealer (optional)
- Googly eyes (optional)
- Craft glue (if using googly eyes)
Now that we have our materials ready, let’s begin the creative journey of making ladybug painted rocks.
Step-by-Step Instructions for Ladybug Painted Rocks Craft
4.1 Selecting Smooth Rocks
The first step is to find smooth rocks of various sizes. It’s essential to choose rocks with a flat surface for easy painting.
4.2 Cleaning and Preparing the Rocks
Before painting, clean the rocks thoroughly with water and let them dry completely. This step ensures that the paint adheres smoothly to the surface.
4.3 Painting the Base Coat
Using a medium-sized paintbrush, apply a coat of red acrylic paint to the entire rock. Make sure to cover it evenly. Allow the paint to dry completely before proceeding to the next step.
4.4 Adding Ladybug Details
Now comes the fun part. Use a small paintbrush and black acrylic paint to create the ladybug’s signature spots. You can make them symmetrically or add a touch of creativity by varying the sizes and shapes of the spots.
4.5 Creating the Eyes and Antennae
To bring the ladybug to life, add eyes and antennae. You can use googly eyes for a whimsical touch or paint them directly using white and black paint. Allow the paint to dry before moving on to the final step.
4.6 Adding Final Touches
In this step, you can let your imagination soar. Enhance your ladybug painted rock with additional details such as a smile, rosy cheeks, or tiny decorative patterns. Be creative and make it unique and personalized.
Tips for a Perfect Ladybug Painted Rock
- Choose rocks with smooth surfaces to ensure easy painting.
- Use high-quality acrylic paint for vibrant and long-lasting colors.
- Let each layer of paint dry completely before applying the next one.
- Experiment with different sizes and shapes of spots to add visual interest.
- Add a glossy finish by applying a clear acrylic sealer once the paint is fully dry.
- Encourage kids to add their own unique touches and express their creativity.
Fun and Creative Ideas to Use Ladybug Painted Rocks
Ladybug painted rocks can be utilized in various imaginative ways:
- Garden Decor: Place the ladybug rocks around your garden beds or potted plants for a whimsical touch.
- Paperweights: Use larger ladybug rocks as decorative paperweights on desks or shelves.
- Story Stones: Create a collection of ladybug rocks with different expressions and use them as storytelling props.
- Gift Decorations: Attach ladybug rocks to gift wrappings for an adorable and personalized touch.
- Nature Scavenger Hunt: Hide ladybug rocks in your backyard or local park and challenge kids to find them.
Ladybug Painted Rocks Craft: Benefits for Kids
Engaging in the ladybug painted rocks craft offers several benefits for children:
- Creativity and Artistic Expression: It nurtures their imagination and allows them to explore their artistic abilities.
- Fine Motor Skills Development: Painting rocks and adding intricate details helps improve hand-eye coordination and fine motor skills.
- Patience and Focus: The step-by-step process teaches children the value of patience and concentration.
- Nature Appreciation: Through creating ladybug-themed rocks, children develop an appreciation for nature and its fascinating creatures.
Safety Considerations
While the Ladybug Painted Rocks Craft is generally safe and enjoyable, it’s important to keep a few safety considerations in mind:
- Ensure adequate ventilation when using acrylic paint.
- Use child-safe paint and avoid toxic materials.
- Supervise young children during the crafting process.
- Remind kids not to put painted rocks in their mouths.
Conclusion
Ladybug painted rocks craft is a delightful and engaging activity that sparks creativity and provides children with a chance to explore their artistic skills. By following the step-by-step instructions and incorporating personal touches, kids can create unique ladybug-themed decorative pieces. The craft offers various benefits, from fine motor skills development to nature appreciation. So, gather your materials, let your imagination soar, and enjoy the wonderful world of ladybug painted rocks.
Frequently Asked Questions (FAQs)
Q: Can I use other colors instead of red for the ladybug painted rocks?
A: Absolutely! Feel free to explore different color combinations and make your ladybugs unique.
Q: Is there a specific type of paintbrush I should use?
A: For this craft, small and medium-sized paintbrushes with soft bristles work well.
Q: Can I use natural rocks from my backyard for this craft?
A: Yes, as long as they have a smooth surface, you can use rocks from your backyard.
Q: How long does it take for the paint to dry?
A: It usually takes a few hours for the paint to dry completely, but drying times can vary based on the thickness of the paint and the humidity.
Q: Can I seal the painted rocks to protect them from weathering?
A: Yes, you can use a clear acrylic sealer to provide extra protection and durability to your ladybug painted rocks.
Q: How can I make my ladybug painted rocks more durable?
A: To make your ladybug painted rocks more durable, you can follow these tips:
- Use high-quality acrylic paint that adheres well to the rocks.
- Apply multiple layers of paint, allowing each layer to dry before adding the next one.
- Seal the finished rocks with a clear acrylic sealer to protect them from weathering and fading.
- Avoid placing the rocks in areas exposed to heavy rain or extreme sunlight, as this can affect their longevity.
Q: Are there any alternative materials I can use for the eyes and antennae?
A: If you don’t have googly eyes or prefer not to use them, you can paint the eyes directly on the rocks using a small brush and white and black paint. For the antennae, you can use thin black wire or pipe cleaners twisted into the desired shape and glued onto the rocks.
Q: Can I involve younger children in this craft?
A: Absolutely! Ladybug painted rocks craft can be enjoyed by children of various ages. For younger children, you can simplify the process by using larger rocks and assisting them with the painting and details. It’s a great opportunity to bond and have fun together.
Q: How can I display my ladybug painted rocks?
A: There are many creative ways to display your ladybug painted rocks. You can arrange them on a windowsill, place them in a decorative bowl or tray, or even create a ladybug-themed rock garden in your backyard. Let your imagination guide you in finding the perfect display option.
Q: Can I use other insect-themed designs instead of ladybugs?
A: Absolutely! The beauty of rock painting is that you can explore various themes and designs. If you or your child is interested in other insects like butterflies, bees, or dragonflies, feel free to adapt the instructions and create your own unique insect-themed painted rocks.


